
First Published 09 February 2016. Last Updated 03 April 2022.
An important asset of any website is the 404 error page. This page displays whenever a site visitor lands on a page that doesn’t exist or is a broken URL.
Whether it is a typo in the URL, a blog post you removed without a 301 redirect, or a page you deleted by mistake, your site visitor needs to have this detour in their browser journey acknowledged.
A clear and simple 404 page can keep users from leaving, save a sale, and redirect your visitors to the content they were searching for.
Thankfully, for Divi users, it couldn’t be easier to build a custom 404 page on a WordPress website.
In this guide, we’re going to look at the three best methods for correctly converting your 404 error page with Divi. These methods include:
- Using the Divi Theme builder, either creating a design from scratch or using one of our free layouts
- Manually replacing the default 404 template with custom PHP
- Using a plugin such as Divi Switch or Page Builder Anywhere
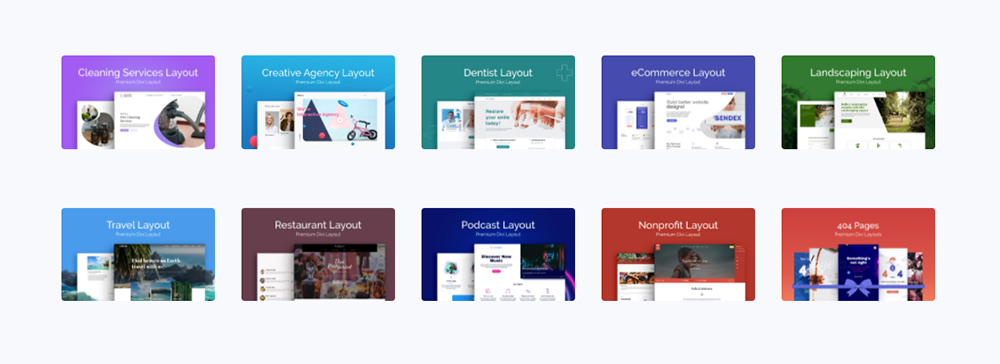
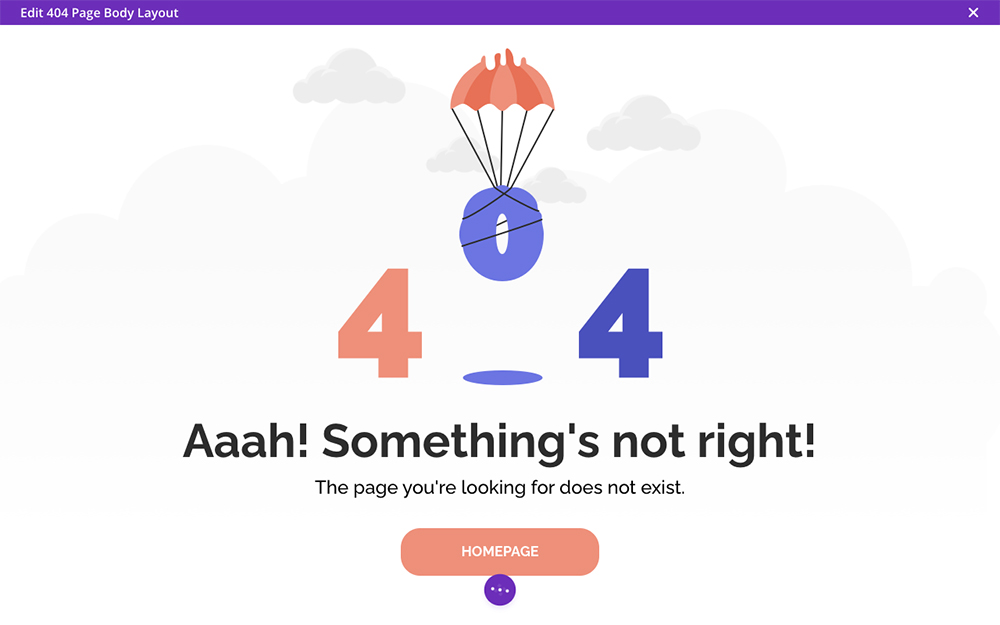
Within this post, you’ll find a collection of free 404 Error Page layouts created by our design team. Download these layouts, add them to your Divi Library and use them in your designs. We love them and know you will too!
If you haven’t already, fill in the form below, and a download link will be sent to your email
Fill in your details in the form below and access the free layouts!
Why You Should Create a Custom 404 Error Page for Your Divi Site
If potential customers don’t find what they’re looking for and aren’t redirected to where they can find what they need, they’ll leave your website and turn to a competitor brand.
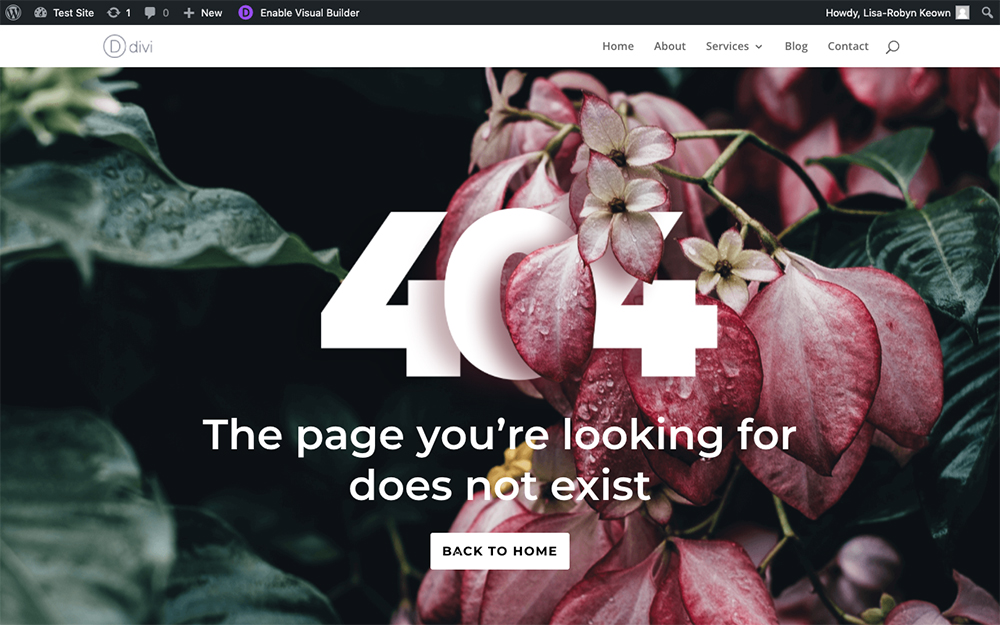
By default, the Divi theme includes a 404 error page, but it’s extremely bland and not very attractive.
By default the Divi 404 error page PHP template is quite bland
Displaying a custom branded 404 error page, one that includes branded graphics, pleasing copy, and directions or next steps for your site visitor to take, will seriously improve the overall user experience of your website.
Here are some tips for creating a great 404 error page for your site:
- Use colors and graphics that align with your brand. Even though it may not seem like it, your 404 error page is a customer touchpoint and should be treated as a branded asset. Use colors from your brand color palette, style buttons to mirror those on the other pages of your site, and make sure your website has a cohesive look and feel throughout.
- Use copy that reflects your brand tone. “The page you’re looking for can’t be found,” or similar, is often the default text found on a 404 error page. While this is satisfactory, the copy could be written in a far more engaging way. If your brand has a particular tone, use this within the copy on the 404 error page, or introduce an element of humor if possible.
- Offer redirection links. Instead of just stating that the page can’t be found, including a few links in the text or as buttons to other key pages around your site. This will lead your site visitor to a relevant section of your website and will allow them to continue their browsing journey. As well as a link to return to the home page, you could include a link to your shop page for them to continue shopping, to your blog so that they can read your content, or to your contact page so they can send you a message.
How to Create a Custom 404 Error Page with Divi
In the next section, we’ll show you several methods for creating a 404 error page using the Divi theme.
- If you want to use the Divi Builder and don’t plan on using plugins for added functionality, use the Divi Theme Builder method. We’ll show you a few methods of using the Divi Theme Builder including building a design from scratch, installing a premade JSON layout as well as using WP Layouts.
- If you want to use a plugin that can fulfill the 404 error page as well as other functions, use a plugin such as Divi Switch or Page Builder Anywhere. Divi Switch is a great option as it’ll let you set up a 404 page in rapid speed also, as it includes several other ‘switches’ to make impactful changes to your Divi site-a real bargain of a plugin.
- If you want to go the hardcore developer route, we’ve included the manual 404 error page development option too. This is a bit complicated method, and it requires changing the theme’s default 404.php template. If you’re just learning Divi, this may be a bit of a jump for you, but if you’re up for a challenge, this will give you a better understanding of the WordPress Template Hierarchy.
Creating a 404 Error Page Using the Divi Theme Builder
The Divi Theme Builder is a fantastic tool. It allows you to use the Divi Builder in several areas that previously were unavailable to the builder. While Divi users could create stunning designs and layouts for their pages, posts, and projects, the Divi Builder wasn’t able to work within the header, footer, archive pages, and similar. Instead, they’d have to use one of the manual methods explained below.
Thanks to the Divi Theme Builder, these previously off-limits areas, including the 404 error page, can now be designed with the Divi Builder, giving users full control of site customization.
Creating a Custom 404 Error Page From Scratch
To begin, head to the Divi > Divi Theme Builder menu.

Select the Divi Theme Builder from the Divi menu
Click Add New Template.
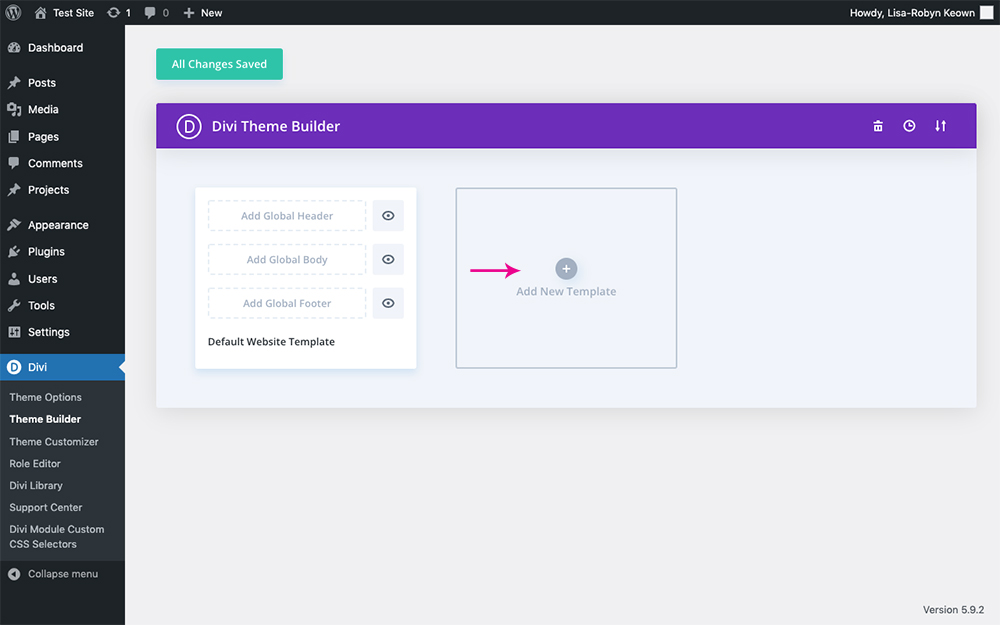
Click Add New Template
From the list, select 404 Page and click Create Template.
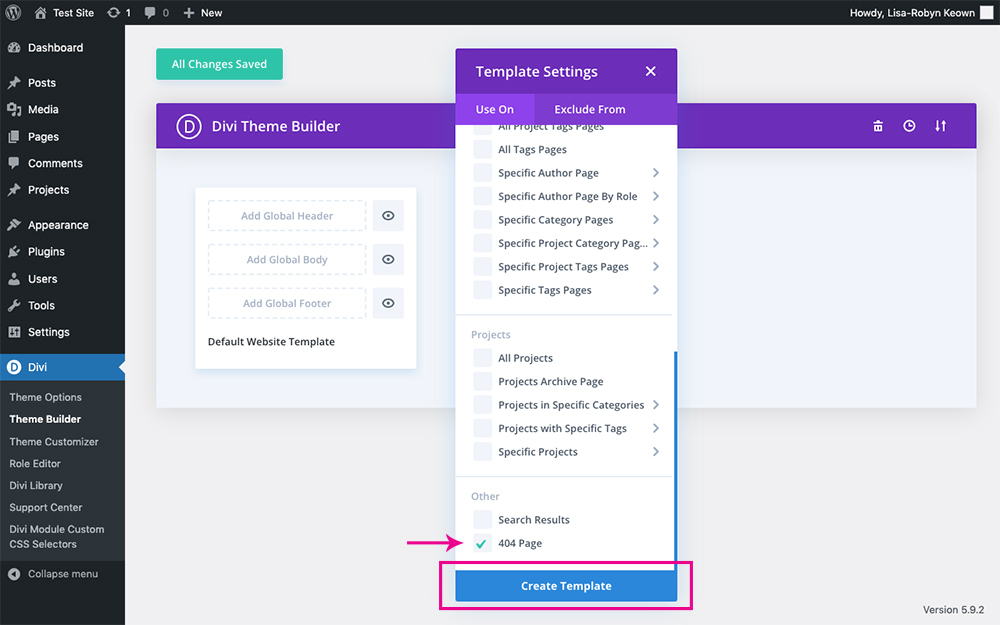
Select the 404 Page option and click Create Template
You’ll notice that there are three sections that you can edit, the header, body, and footer. Typically, 404 error pages have nothing to do with the header or footer, so you’ll be creating a custom body. If, for some reason, you’d like the header or footer to be different on the 404 error page, you could use the Divi Theme Builder to create custom assets here, although it’s really not necessary. Click Add Custom Body.
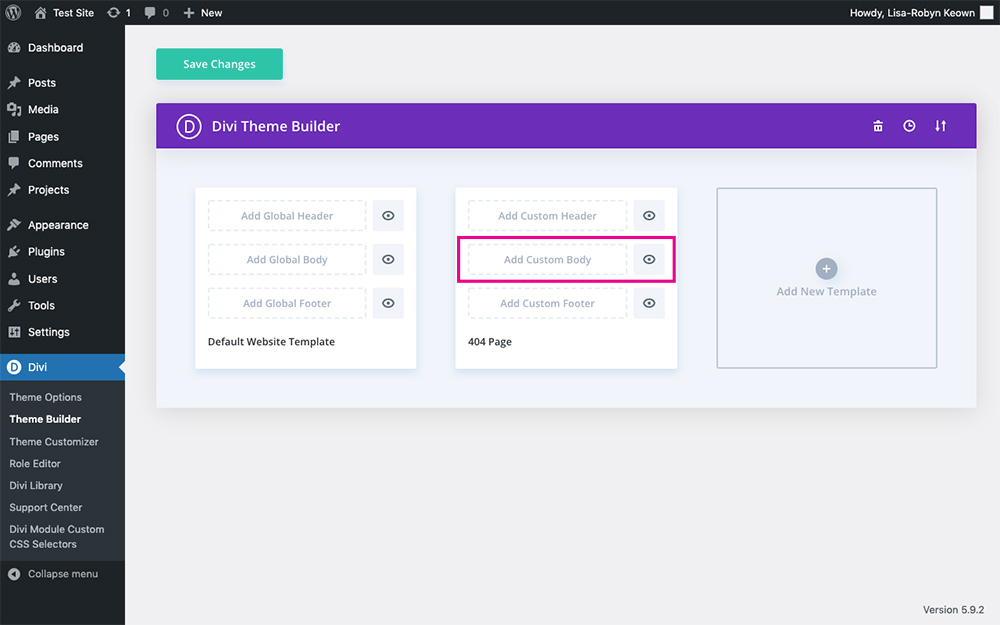
Click Add Custom Body
Here you can decide to either create a new design from scratch or add one from the library. If you’ve got a previous design that you’ve uploaded to the Divi Library or are using one of our custom layouts linked below, you can select them from the Divi Library this way. For this tutorial, we’ll be creating the layout from scratch, so select Build Custom Body.

Select Build Custom Body
Next, the Theme Builder will open on a new page. You’ll see a blank screen with the familiar Divi Builder open and ready to be used. Begin by clicking the green plus icon button, add a new row and begin populating the page with modules.
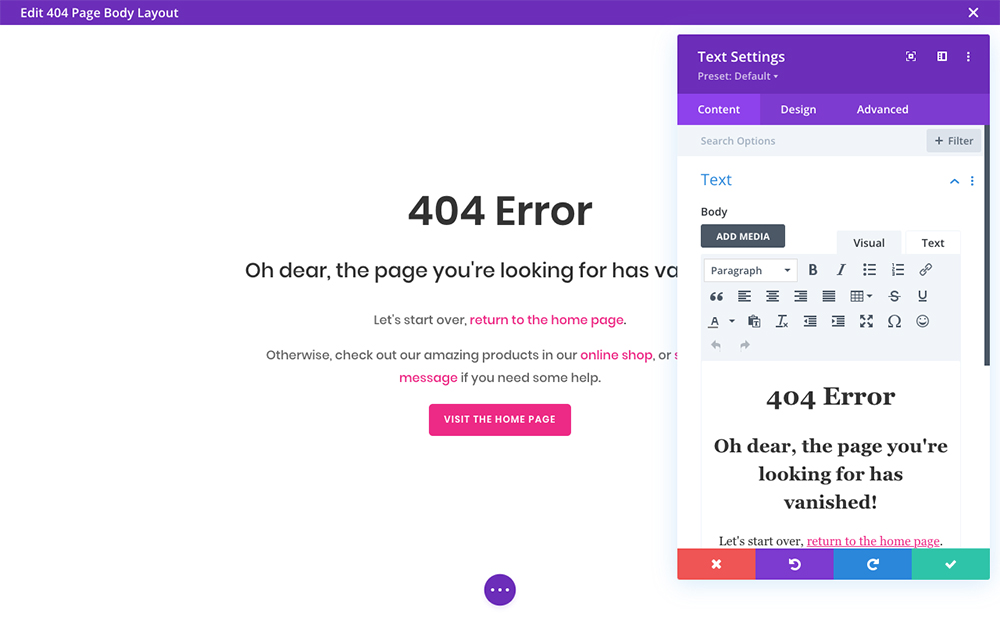
Create your 404 error page design
When you’ve completed your design, click the Save button to save your work. Then, click the small x icon in the top right corner of the screen to exit.
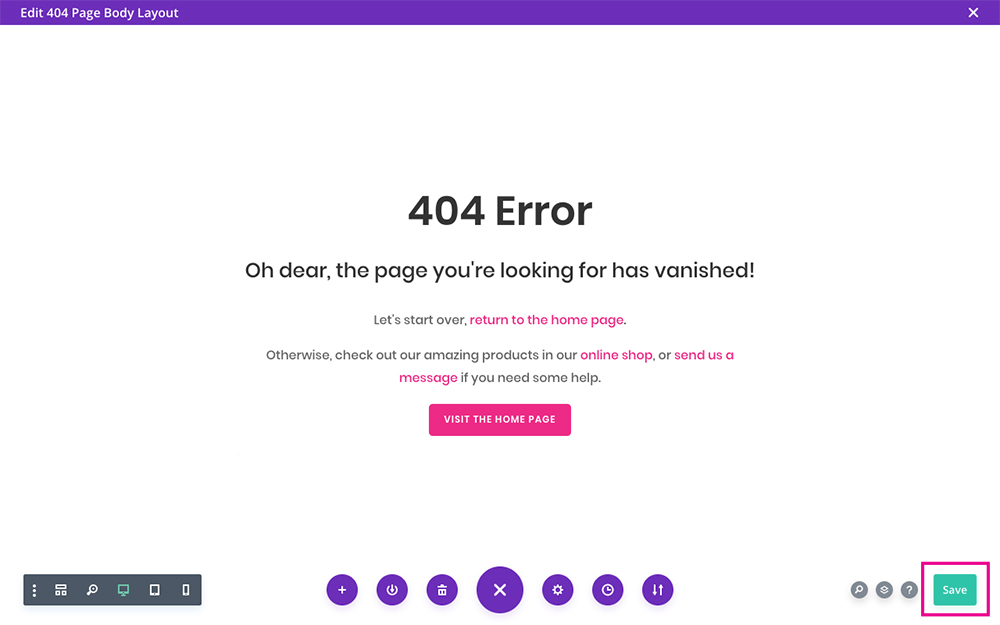
Remember to save your design
You’ll be taken back to the Divi Theme Builder. Here, click the Save button again.
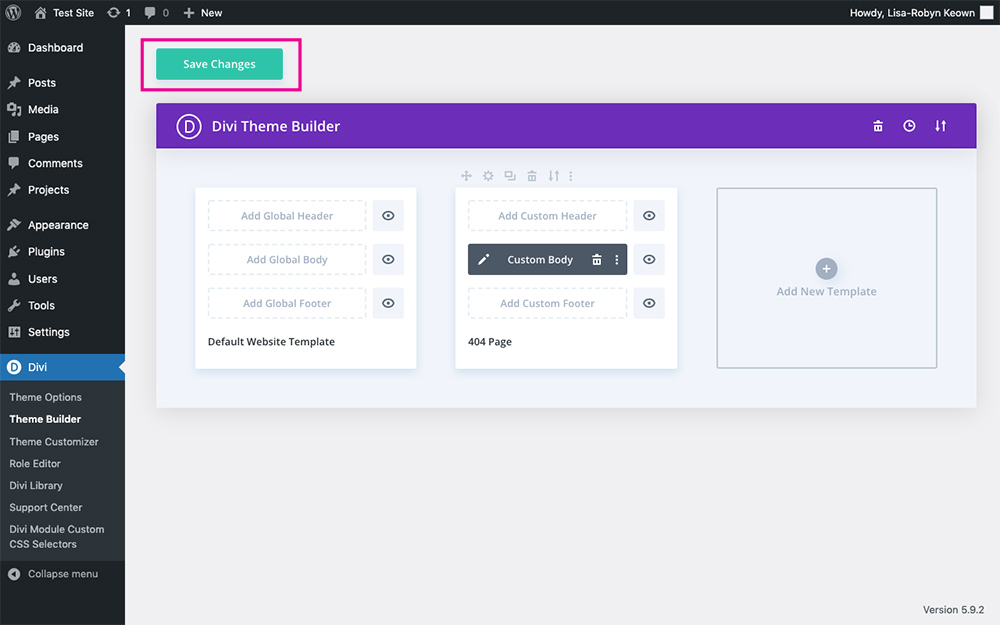
Save the changes
Now that your design is complete, head to the front end of the site and navigate to a broken link by entering a gibberish URL into the browser bar. You’ll see that the boring default Divi 404 error page is gone, and your beautiful custom design, complete with on-brand colors, quirky copy, and redirection links, will display.
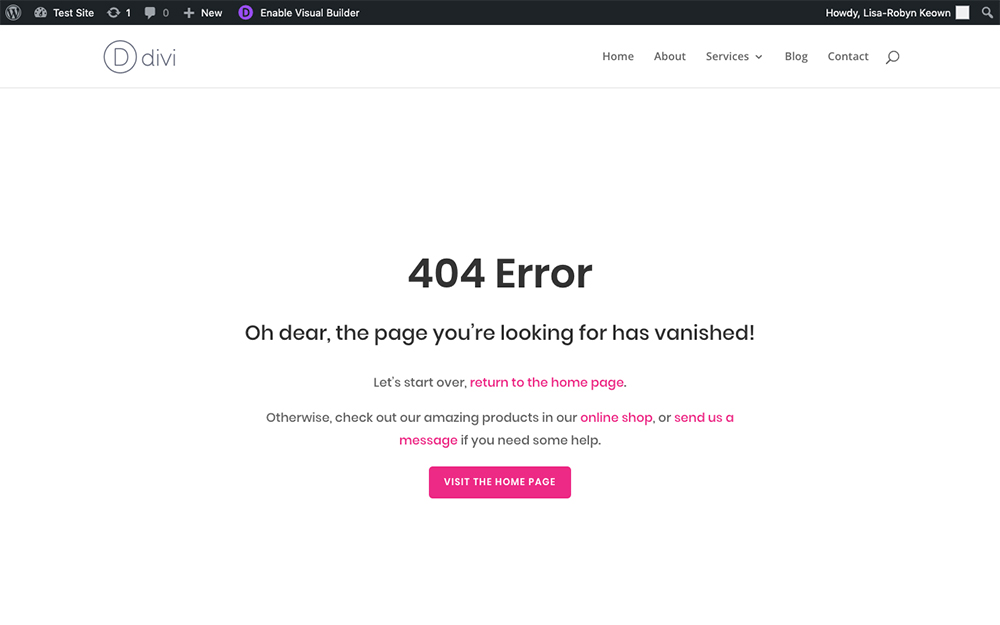
The 404 page is complete
Creating a Custom 404 Error Page Using a Premade Design
If you’re not feeling all that creative or design isn’t your strong suit, you can use one of our free premade 404 error page JSON layouts. If you haven’t already, fill in the form below, and a download link will be sent to your email.
Once the files have been downloaded to your computer, unzip the .zip file, and you’ll find the JSON layouts in a single file, as well as an instructions text document.

Unzip the .zip file and you’ll find the JSON files
Return to your website and head to the Divi Library.
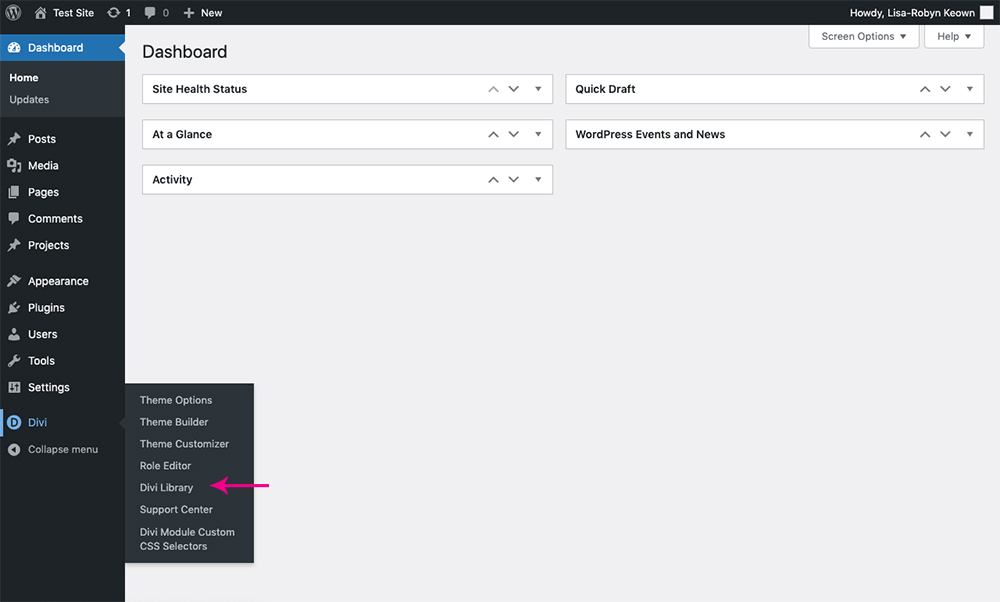
Select the Divi Library from the Divi menu
Click on the Import & Export button.
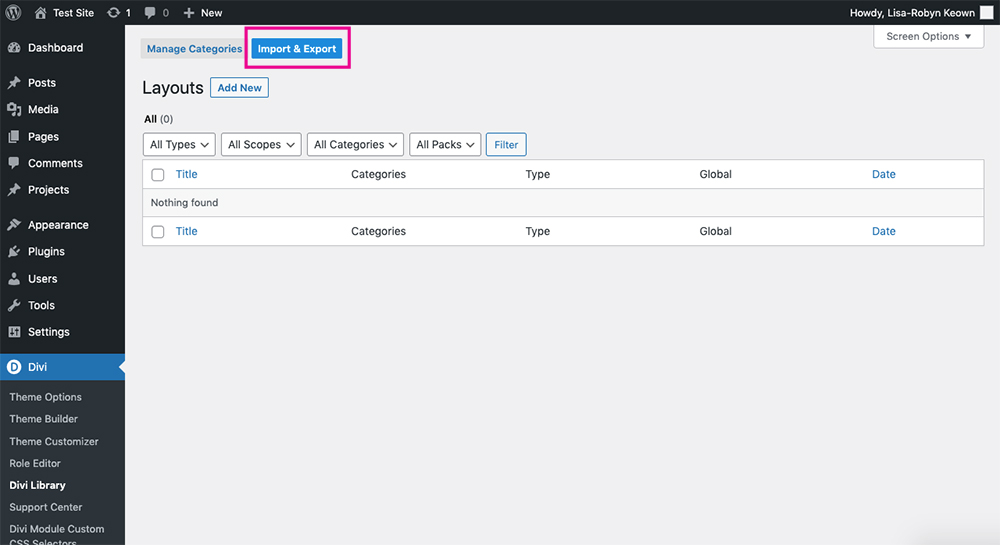
Click Import & Export
Select the JSON file from your computer and click the Import Divi Builder Layouts button.
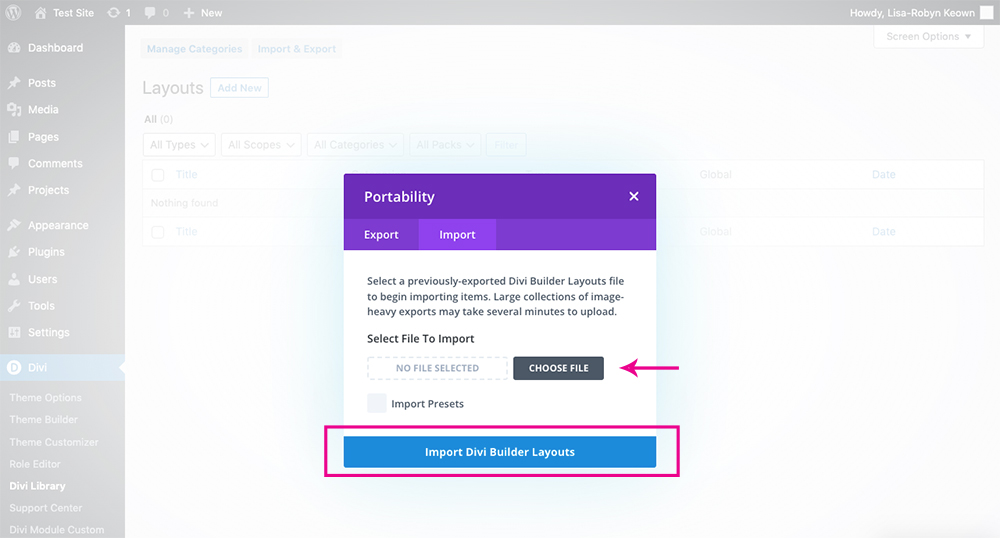
Select the JSON files
The layouts, five in total, will appear in your Divi Library.
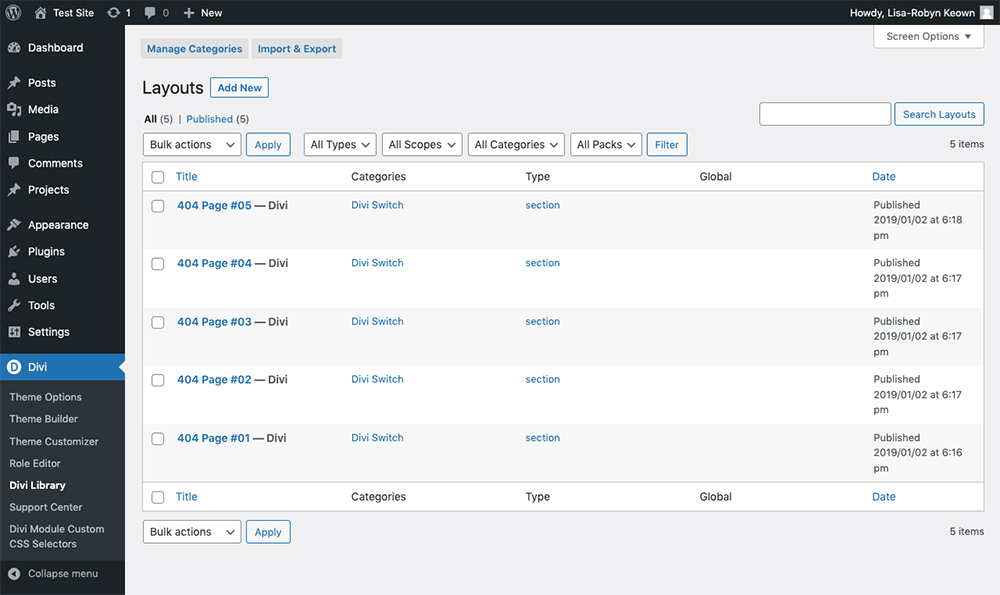
All of the JSON layouts will have been added to the Divi Library
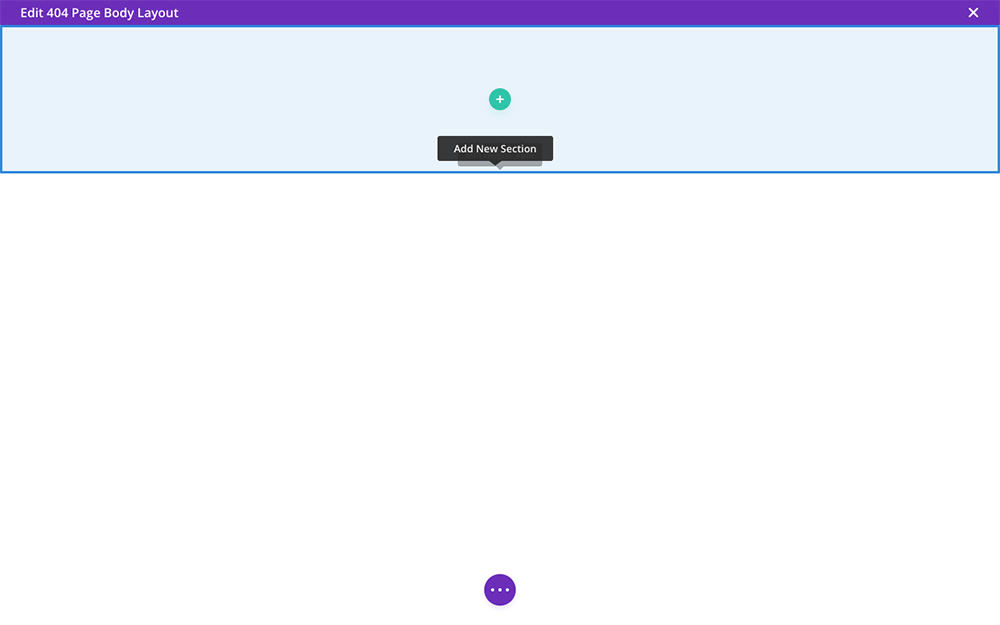
Return to the Divi Theme Builder, add the 404 error page template and click Build Custom Body.
Select Build Custom Body
The Theme Builder will open the page in a new window. Add a new Section.
Add a new Section
Then, click the Add from Library tab.
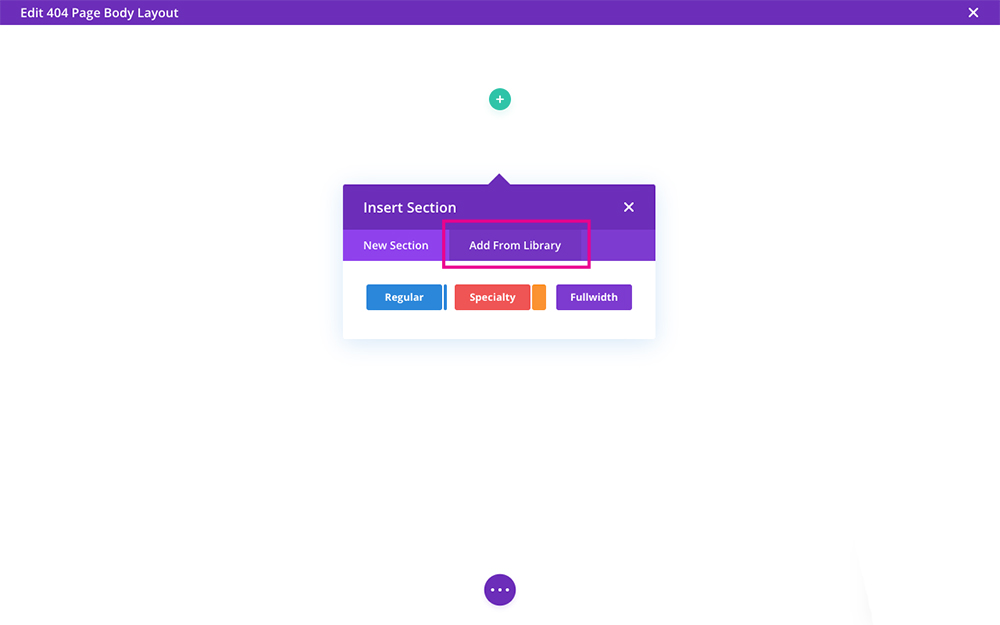
Click Add From Library
Here you’ll find all of the previously imported Divi JSON layouts. Select one and click Save.
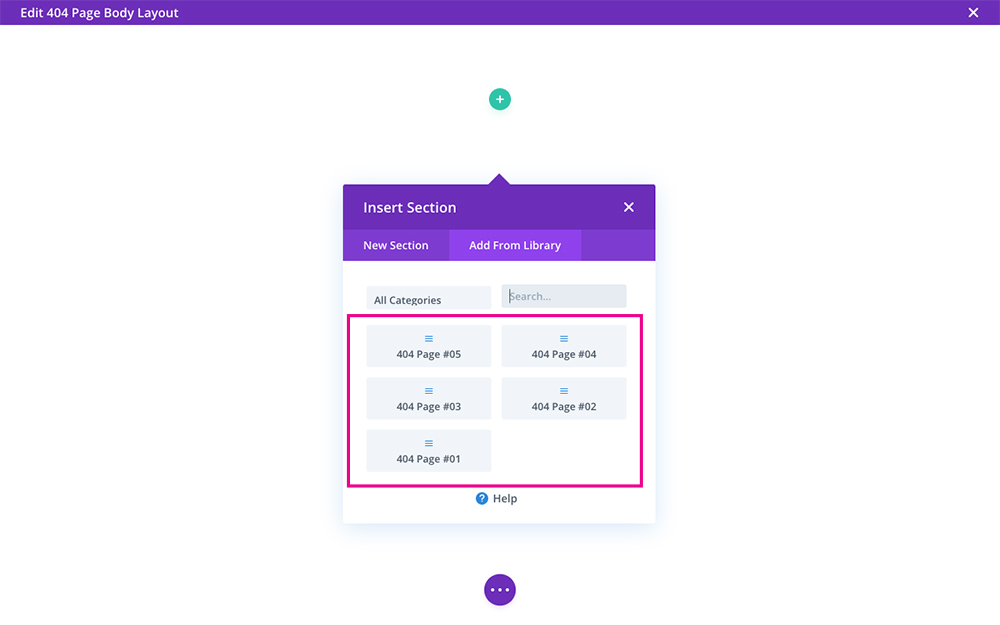
Select one of the 404 page layouts
Add the layout and remember to save your progress.
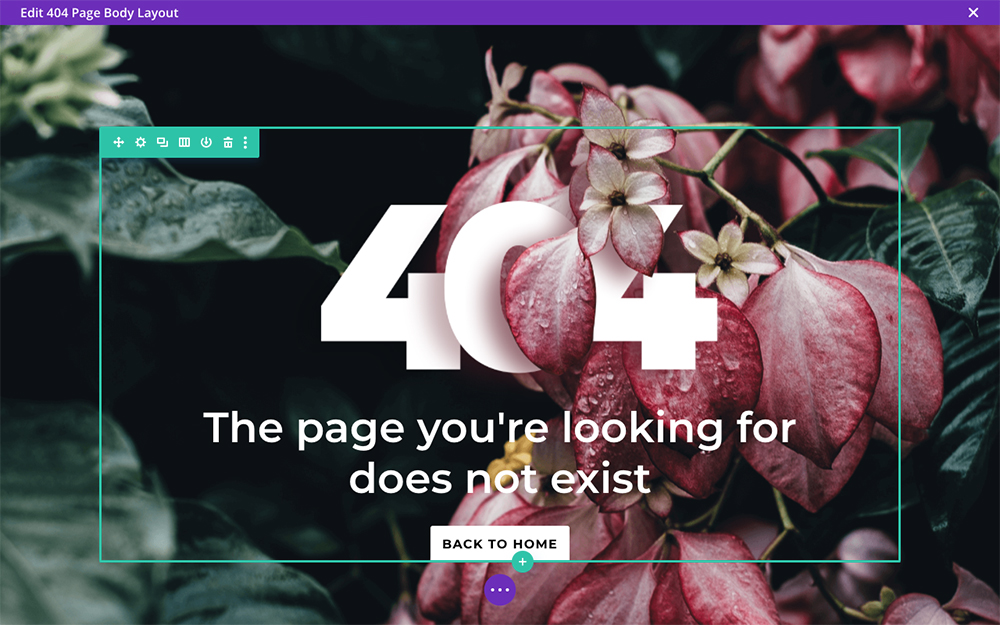
The predesigned layout will be added
Return to the front end, and you’ll see the layout has been set as your 404 error page.
From the front-end you’ll see the design is added
Adding 404 Page Templates Using WP Layouts
Another quick method of adding the custom Divi 404 page layouts is to use our platform WP Layouts. Instead of manually adding the JSON files to the Divi Library, WP Layouts lets you add the 404 page templates from within the layout plugin.
WP Layouts works by storying various layouts in a cloud-based system. Not only can you access the layouts we’ve created, but you can also create your own designs and save them to the plugin. The designs you add will be stored on your account, so you’re able to access them on any site you have WP Layouts’ plugin activated on.
There are several other layouts included in the WP Layouts plugin, including full-page designs and industry-specific designs. If you’re looking for a collection of extra premade layouts to use in your designs, WP Layouts is a great option for you.
View all layouts included in the WP Layouts plugin
First, you need to create a WP Layouts account. Once you’re signed up, you’ll get immediate access to download the WP Layouts plugin. Install and activate the plugin as per usual. Before using the plugin, you’ll be asked to sign in to your account.
When you create a new page or post using the Divi Builder, you’ll find two new layouts tab from within the Load From Library tab:
- WP Layouts, layouts automatically included within the plugin
- My WP Layouts, any layouts that you create and save to your account via the plugin, will be stored here.
Head to the Divi Theme Builder and create the 404 template.
Select Build Custom Body
Once inside the Divi Builder, click the + icon to access the various layouts libraries. Click the WP Layouts tab, and you’ll see several designs. Navigate to the Miscellaneous tab, and you’ll find all of the custom Divi 404 page designs.
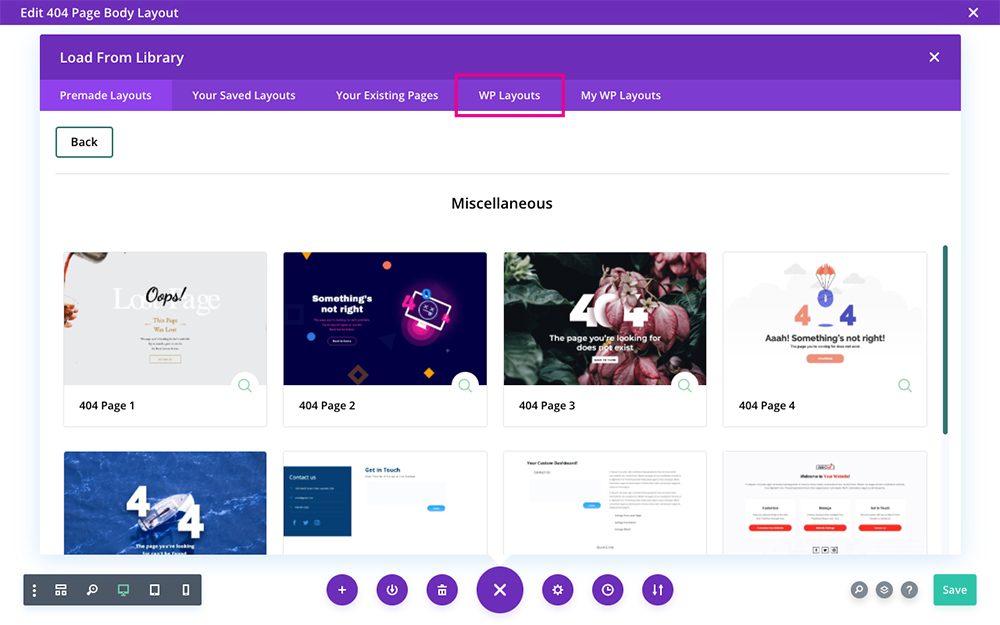
Select the layout you like
Select the layout you like, and let the import run.
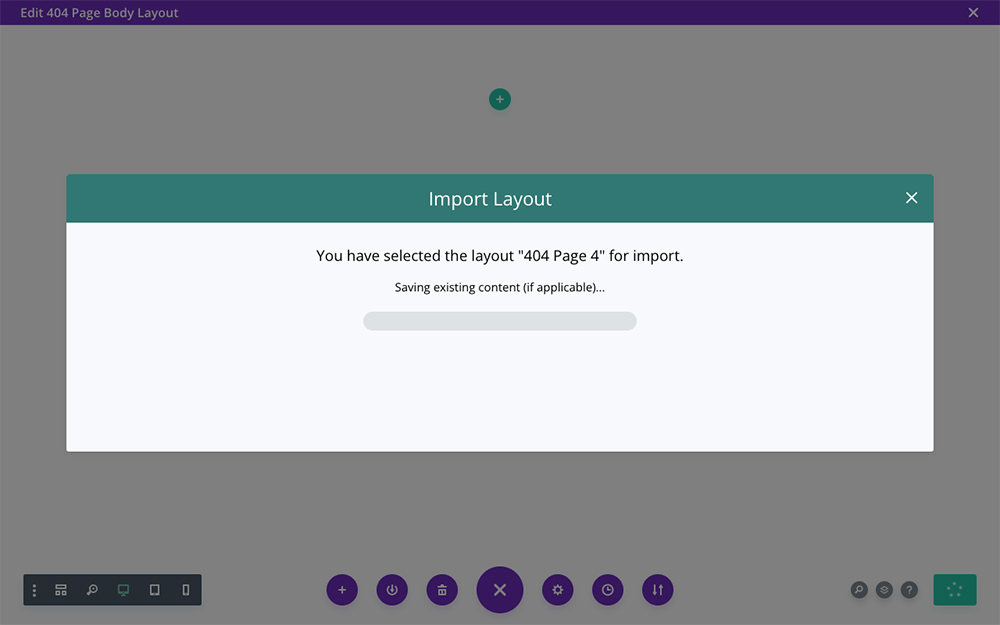
The layout will take some time to install
Save the design, and you will have created a 404 page in seconds.
Your 404 page template is complete
How to Manually Create a Divi 404 Page Using PHP
If you know a little about PHP then replacing the default 404.php template is fairly easy. This requires creating a new 404.php template and adding it to your child theme. Make sure you reference the new additional file and also style it using CSS. This is a more developer-oriented route, and using the Divi Theme Builder as mentioned above is far simpler.
Another method is to build a normal page using the Divi Builder Builder and replace the ‘no-results.php’ template with the new design.
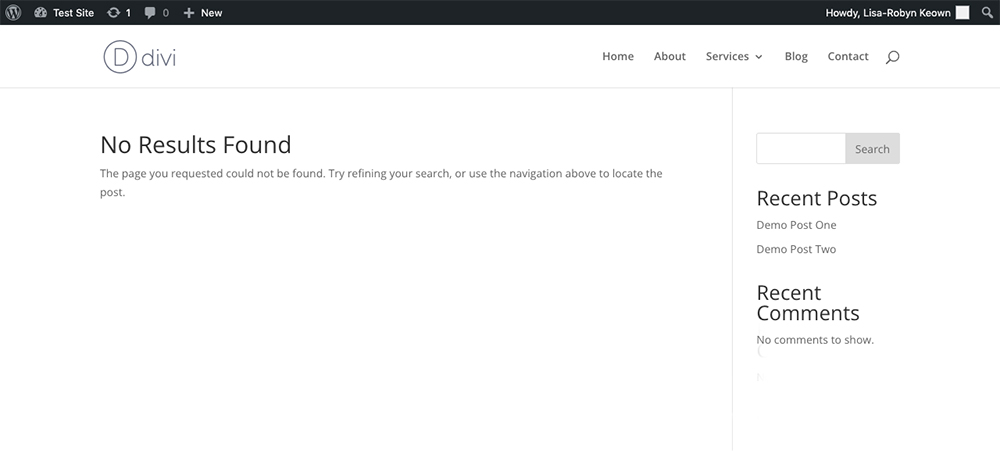
First, you need to set up the template. By default, the no-results.php looks like this:
<div class="entry">
<!--If no results are found-->
<h1><?php esc_html_e('No Results Found','Divi'); ?></h1>
<p><?php esc_html_e('The page you requested could not be found. Try refining your search, or use the navigation above to locate the post.','Divi'); ?></p>
</div>
<!--End if no results are found-->
We need to replace the text that’s being called with a bit of PHP code that will load a page instead.
In your child theme, create a folder called ‘Includes’ at the root level, the same place as your functions.php. If you’re already using a child theme that has an ‘Includes’ folder in it, then ignore this step.
Inside that folder, either copy the no-results.php template from the parent Divi theme (you’ll find it in the ‘includes’ folder) or create a new file called no-results.php.
Open your new ‘no-results.php’ file and if it isn’t already blank, delete everything in it. Now that you have a blank canvas, add this code:
<div class="entry">
<!--If no results are found-->
<?php $id = ###; $p = get_page($id); echo apply_filters('the_content', $p->post_content); ?>
</div>
<!--End if no results are found-->
If you’re worried that you may get the steps above wrong, just unpack this custom-404 zip at the root of your child theme instead. I’ve already taken care of the code for you.
Next, it’s time to add content to the 404 page.
You’ve now replaced the standard template with your own that has the ability to call a page, by its ID into the content.
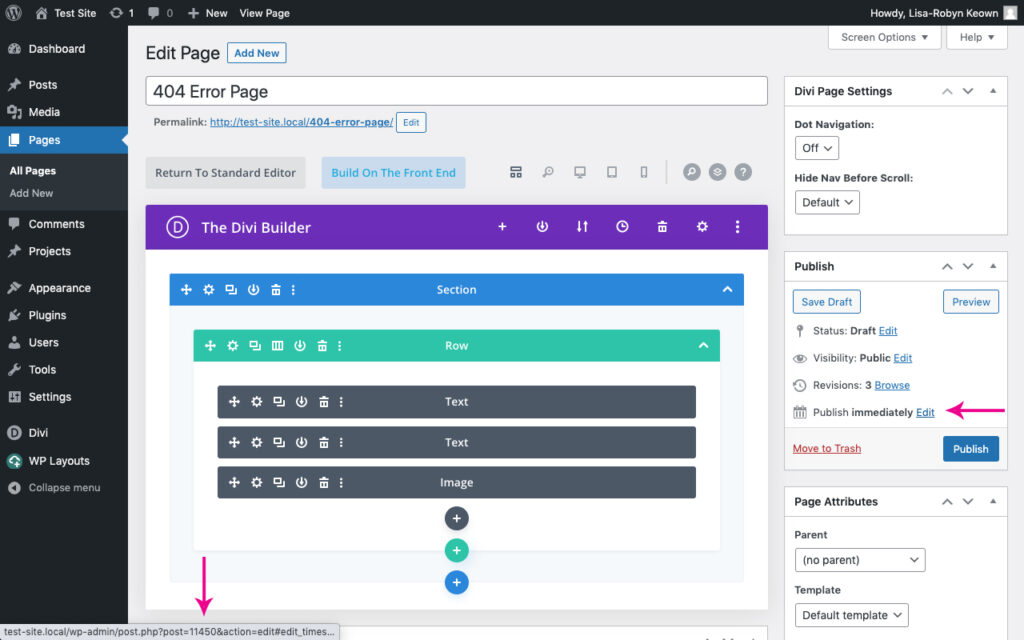
Now, create a new page and add any content that you’d like to appear on the 404 error page. Save the page as a Draft and grab the page ID.
To find page ID, hover over the ‘Edit’ button next to the ‘Publish Immediately’ option in the Publish section. Look at the bottom left corner and you’ll see a line of text pop up. Where the text says “post = ###” the number is your page ID.
Locate the page ID number
Make sure you’ve saved the page, copy the ID number and head to Appearance > Editor console in the Appearance menu. Look for the file that says no-results.php and click on it to edit. In your version, you have to replace the ### with whatever number was displaying as the page ID.

Add the ID number
Now your 404 template will call the new page you’ve just created and will display it instead.
The only thing left to do is add some CSS to remove all of the padding and margins from the default 404 to ensure that the page fills all of the space available. Here’s the CSS you need to add to you child’s style sheet:
.error404 #main-content .container, .error404 #content-area, .error404 #left-area {
padding: 0 !important;
margin: 0 ;
width: 100% !important;
max-width: none;
}

.error404 #sidebar {
display: none;
}

.error404 .et_pb_post:last-child {
margin-bottom: 0;
}
Then, add the following for the no results page:
.search-no-results #main-content .container, .search-no-results #content-area, .search-no-results #left-area {
padding: 0 !important;
margin: 0 ;
width: 100% !important;
max-width: none;
}

.search-no-results #sidebar {
display: none;
}

.search-no-results .et_pb_post:last-child {
margin-bottom: 0;
}
Now that you’ve completed all of the tough work, the final step is to test whether the 404 page is using the new template.
Navigate to the front-end of your site, and add a random slug to a page that does not exist. If your template is displaying correctly, congratulations! You have successfully manually set a custom 404 page for your Divi site.
Creating a Custom Divi 404 Page Using Plugins
Before the Divi Theme Builder, Divi users had to rely on other methods of creating custom 404 pages. For many, the manual route was too complicated, but thankfully, there are a handful of plugins that made the process of creating a custom 404 error page far easier.
Divi Switch
Divi Switch is a great plugin as it offers several methods for making functional and aesthetic changes to a Divi site. There are ‘switches’ that can be turned on or off depending on the effect you’re looking to achieve.
If you plan on running A/B tests on your 404 page, making minor tweaks over time, or are using a plugin to expand Divi functionality, the plugin option eliminates steps and allows you to create and customize a 404 page as easily as setting up a new page with Divi.
With Divi Switch, you can make any page you create the 404 page.
To get started, create a page. From the WordPress dashboard menu go to the Pages menu and click Add New.
Add a new page from the WordPress dashboard
You can give it any slug you like and style it just like you would any page. For this example, I am going to use the page title “404”.
Style your page how you like. Here is an example using one of the free JSON layouts.
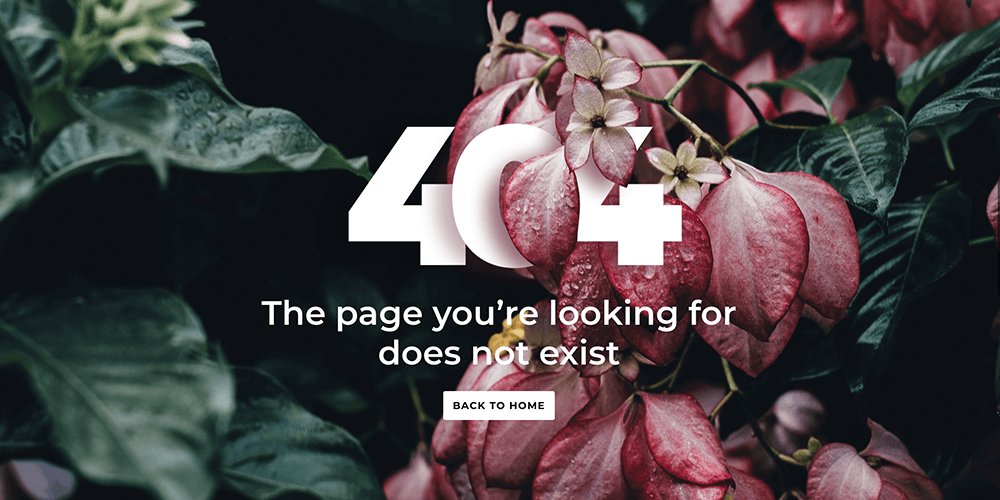
Here is an example 404 page using a free JSON layout
Once you’ve published your page, with Divi Switch active on your site, go to Divi > Divi Switch and under the Main Content tab, scroll to the Custom 404 Page option, and select the desired page in the dropdown menu.
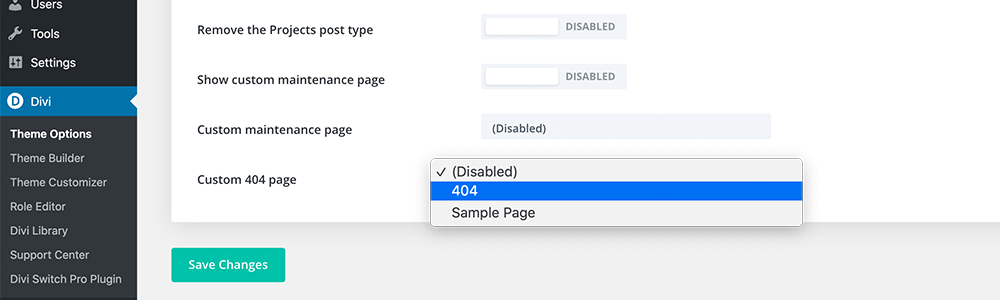
Select the page
Click Save Changes, and that’s it.
Now you can edit your 404 page just like any other page. Switching to a new slug, design, or page moving forward is as easy as returning to the dropdown menu and selecting a new page.
Page Builder Everywhere
Page Builder Everywhere takes a different approach than Divi Switch to expanding Divi functionality. Where Divi Switch adds simple toggles for turning on features, Page Builder Everywhere allows you to not only use Divi elements on pages and posts, it lets you and Divi elements anywhere text goes.
Create and save a layout and then use the widget editor to apply your custom 404 page conditional logic to apply it to your page.
Here is a video tutorial on how you can use Page Builder Everywhere:
If you are already familiar with the Page Builder Everywhere logic and more comfortable using the widget editor or the WordPress customizer, this option eliminates the need for adding an additional option but if you are looking for the quickest option we recommend using Divi Switch.
Ending Thoughts
Divi makes customizing every part of your WordPress website easy from landing pages and posts to custom archive pages, and even 404 pages.
With the Divi Theme Builder at your fingertips, you can create a custom Divi 404 page really easily. And if you choose to use our beautiful layouts, you don’t have to lift a finger.
We want to hear from you.
Did this guide help you set up a custom 404 page? Let us know what other guides we should create if you have any questions.
Just wanted to say this worked for me in the year 2020. Thank you for walking me through it and updates by Anna. For me the only way the css (no-sidebar) worked was to put the code in the Theme/Customization/Addl. CSS area. I do have other css in a style.css child page that works. But this didn’t want to do that. Maybe in time or it was just a server issue? Thanks again!
Thank you Stephan! Worked perfectly.
Tip that may help others, the css code needed to be in the Divi Theme Options and not in my child theme style.css file.
Hi Diana, probably you have been putting css in the wrong place or in the wrong way 🙂 It’s always better to put custom css in a child theme! Let me know if you need any help and figure it out what was wrong.
Hi,
This works very good for the 404 page, but not for the no results page after searching. Anyone got the solution???
I updated the post with CSS code for no results page. Let me know if it works for you!
Hi Stephen,
i added the no-result.php inside the includes folder of my child theme, and changed the ID for the draft page. However, it is not showing anything , as yo can see taging1.viajarlocuratodo.com/sara
Thanks for the tutorial and your help!
1.No-Result-Page works after menu-bar search was used.
2.I integrated a divi search module within the no-result-page.
3. I searched within the “no-result” page something without results
4. Instead of showing again the no-result-page in fullwidth, the “no-result” pages shows up only as a result, with sidebar, like a usual finding of a post.
Can someone help in this issue?
I got the same issue bro, hope they have the solution…
I updated the post with CSS code for no results page. Let me know if it works for you!
Thank you Stephen!
I’ve also used Teresas code to get rid of the header and footer. See my example here: nataschabuck.com/404
I’d like to adapt this concept to the password protection page (where the user is asked to enter a pw). How could that be done?
Simple and it worked!
Just followed the instructions and everything worked peachy! Thanks for that. One of the best essential guides on the web for WordPress/Divi.
Looks like the new CSS to get rid of styling only works on a 404 page, not the no results from search page. Anyone figure out how to get it to work there as well?
Hi Nina, I updated the post with CSS code for no results page. Let me know if it works for you!
Hi I am having issues with the header changes from transparent to colour and different logo on scroll for 404 should I have used this but doesn’t make any difference to the 404 page: sitescreated.com.au/website-servicews/
#logo2, .error404#logo {
display: none;
}
.et-fixed-header #logo, .error404.et-fixed-header #logo {
display:none;
}
.et-fixed-header #logo2, .error404.et-fixed-header #logo2 {
display:inline;
float: none;
max-height: 54%;
margin-bottom: 0;
vertical-align: middle;
}
I am not sure if my first comment came through. I did everything from tut and comments and still having issue where ALL styling is showing up with sidebar and all. Please help!!
Can this method be used to have a general 404 page and a custom 404 page to be shown under a specific path such as downloads (i.e. domain.com/downloads/filenotavailable.pdf )) ?
Thanks for posting this. Unfortunately did not work for me, though this one did: worthitmedia.co.uk/easy-custom-404-page-using-divi-builder/. Thought perhaps a caching issue. Was never able to figure it out.
404 is here: goatcloud.com/jlkj/
Aahh.. Finally found how to make 404 page. 🙂
This is my 404: /psdvn.com/error-404/
Thank you for this tutorial.
PSDVN can you help me how create you 404 page from Cpanel
Same here. Styling did not work when included in the child’s style.css. Like other “recent” commenters, it worked right away when dropped in the Divi Theme Options –> Custom CSS box.
Something must have been updated in Divi that broke the original method outlined here.
So thankful for this tutorial, it’s easy and awesome. Thank you so much.
I was also having trouble getting it to appear without the sidebar, as a number of people have mentioned. I was able to fix the issue by placing the code in the custom CSS box in my Divi theme options menu rather than in my child-theme’s stylesheet.
And for some reason I kept getting a small margin at the top of my content, just under my nav bar. I had to give the content area a negative margin-top value to fix that. Your mileage may vary…
Here’s the modified code I used if anyone is interested.
.error404 #main-content .container, .error404 #content-area, .error404 #left-area {
padding: 0 !important;
margin-top: -15px !important;
width: 100% !important;
max-width: none;
}
.error404 #sidebar {
display: none !important;
}
.error404 .et_pb_post:last-child {
margin-bottom: 0;
}
This is the way to do it!
Cheers,
I don’t know where to put the following code … I used DIVI theme to create my page. The right column is still there (example : modeles.mawebsolution.ca/eee
/////////////////////
.error404 #main-content .container, .error404 #content-area, .error404 #left-area {
padding: 0 !important;
margin: 0 ;
width: 100% !important;
max-width: none;
}
.error404 #sidebar {
display: none;
}
.error404 .et_pb_post:last-child {
margin-bottom: 0;
}
Hi Marcia, you can place this code in your theme options custom css box if you don’t have a child theme installed.
Hi, I finally got this to work when I uploaded this file as 404.php instead of no-name.php however it’s not pulling any styling, just the written content of the post. Any idea why and how can I fix this?
I meant *written content of the page, not post
I have tried to apply this tutorial to an Extra theme that’s similar to Divi’s but there are some fundamental differences that won’t allow me to do that. The main is that I couldn’t find the no-results.php file and only adding a 404.php file into my child theme folder would do the trick but not entirely, meaning that I’ve ended up with a page that doesn’t look like what I’ve been expecting. I like the idea of creating the 404 just by adding a page on my website but not sure to achieve that for my Extra theme.
hlbenefits.com/404
This is a brilliant tutorial… thank you so much for sharing your expertise.
Thanks Alice!
Excatly what I was looking for, Thanks for this.
Hi,
This is very informative. I have been looking for this info for quite a while.
Thanks for sharing this.
OK, maybe mention that you don’t need to copy the 404.php template from parent theme that ships with current Divi theme! Nice tut.
SJ, thanks so much for the post! This is the easiest custom 404 tut I’ve seen. Saved it to my evernote and shared it on facebook. Also, love listening to you on divi chat. I’m a 7 year teacher turned divi web developer and learning as I go. Thanks for giving me another tool in my toolbox. Cheers!
Clearly other people have gotten this to work, but I can’t get any custom page content to load. I applied the styles above and know I’m calling the correct page ID, but the value of $p is nothing, so the resulting page is effectively blank. get_page() is deprecated, so I tried using get_post() instead with no change. Does this customization still work for WP 4.6.1 / Divi 3.0.8? Any ideas what might be going wrong?
Hey, there’s no reason it shouldn’t work with latest wp
Great tut, thanks a lot!
I’ve tried this with the latest WP and the latest Divi 3…the content from the page I created doesn’t show up on the 404 page at all. Any thoughts?
This tutorial is awesome, but NOT being a programmer–I’m a bit discouraged.
When I tested the preview of the page, it all looks fine…but then I tried using it and the results page creates 3 columns no matter what I do.
Anyone know why that might be??
I built the page with Divi’s page builder and this 404 page is one of the last things left to go live in 2 weeks.
Help?
I’m using WordPress 4.6 and the latest version of Divi.
Thank you much!
Jaime Buckley
Fantasy Author/Cartoonist
…and by the way SJ, I have 12 kids =)
Hey Jaime, How did you get the results page displaying with three columns fixed to show just your page layout as is? I’m having the same problem using the tutorial above.
I updated the post with CSS code for no results page. Let me know if it works for you!
Hi Stephen,
Thanks so much for this great tutorial! It works perfectly except for the sidebar space (that still seems to be there). I wish my content was centered, just like on your awesome 404 page.
I’ve also tried creating and editing a 404.php file in my child theme but still not working.
Any idea what could be wrong?
Thanks!
Oops, I’ve forgot to put the link to my 404 page:
http://www.ketchose.com/404
I can’t see where you set the page body class to error404 …? Can you elaborate on that?
hello
on WP 4.5.3 with Divi 2.7.8 and css is in Divi-child.
I have a similar issue as reported above.
While viewing the “Preview Changes” of my custom error-404 page, it is OK, but viewing it live (going to non existing page)I get the custom error-404 page with additional content of a post menu and vertical line. This page name seems to be “404 Not Found” which is not my custom error-404 page.
I have tried both Stephen’s and Leha’s codes and got the same.
Will appreciate any help.
great post. It works for 404.
What if I want to add unique pages for 401, 403, 500 (with different content relates to the error#)?
Out of creating the pages what should be changed in the no-result.php and in the style.css ?
thanks for your help
I customized 404 page successfully! Thank you for your article. 🙂
Hi SJ,
I still get the sidebar. I’m using WP 4.5.2 and the latest version of Divi.
Thanks, Zbysiu
Hi, all: Thank you, Stephen for the excellent customization!
For those having trouble getting rid of the outer page stuff, I used a combination of Stephen’s code and CSS, and some more CSS that was posted here by Ed. If you target Ed’s CSS to just the 404 page the same way Stephen did, it will preserve the rest of the site. Here’s the CSS I used:
/* Remove Divi 404 Page Stuff */
.error404 #main-content .container, .error404 #content-area, .error404 #left-area {
padding: 0 !important;
margin: 0 ;
width: 100% !important;
max-width: none;
}
.error404 #sidebar {
display: none !important;
}
.error404 .et_pb_post:last-child {
margin-bottom: 0;
}
.error404 #top-header, .error404 #main-header, .error404 #main-footer {
display: none !important;
}
Wow – this one works!!!
Thank, dude!
I have created a 404 page. My idea is a blank page (without menu and footer) this is the page: gestiondeactuantes.es/404-2/
But when I try to access unknown page as this for example gestiondeactuantes.es/ljrltjwrt
the menu and footer appear.
How Can I remove them?
Thank you
have you tried this on extra? i could not get it work.
Hi SJ!
Great tut, but my 404 gets a sidebar. I used a teplate with fullwidth and placed the css in the child theme style.css, what is not correct?
wayout.no/hloska
Hello, Thanks a lot for the tuto. It worked great. But since I upgraded to WP 4.5, I have the same problem as Wayne (footer compressed). Do you have a suggestion ? Thanks.
Séverine
SJ, I used this today to build a new 404 page, worked perfectly. However, right after I upgraded to WP 4.5 and now my footer is compressed left almost as though the sidebar is still there. To compound the issue if you go to the new 404-page evolt.us/404-page it looks fine. However, if you go to evolt.us/home2 (which doesn’t exist) this is where you see the compression of the footer. Any thoughts or suggestions would be appreciated.
Worked like a charm! Thanks, mate!
Here it is for now, til I go live: vivatestsite.com/DestWest/crazy404page
Worked perfectly, thanks! 😀
Hi SJ,
It worked a treat.
Thanks,
John.
Hi! Thank you for the great tutorial!
Here is my error page marcprobst.com/blog2016/ukfzuf
But the CSS doesn’t seem to work. You can still the small sidebar line at the bottom and also there is a wide gap at the top. Any idea how to fix this?
Thank you!
Thanks SJ!
That was a great help. Especially after I read the final part of the article and fixed the styling :-}
Awesome!
this is mine: salmonproject.wpengine.com/not-a-link.html
but there’s some extra white space at the very top (you can see the sidebar line). must be some css I still need to adjust?
Hey, How did you fix it? Experiencing the same tiny space above the main header.
Hello,
thank you so much sharing this most east way. Here is my new shiny 404 page. bbck.sk/404-2/?lang=en
Awesome 🙂 Great place for a contact form 🙂
Is it possible to use this same idea for single.php pages? I like to use completely custom divi pages using the blank page template but then my default WordPress pages like the 404.php and the single.php still use the divi default template.
You may want to consider using the page builder everywhere plugin to recreate headers on static pages too.
Patrick,
Since I wasn’t using the default headers or footer (on any posts/pages), I just added this to the CSS and it works for what I need.
#top-header, #main-header, #main-footer {
display: none !important;
}
Hello, SJ. I know there is something I’ve done wrong but I can’t pinpoint what. Even after placing the CSS code, my site keeps displaying the sidebar… Will you give me a hand?
My site is bikerdreams.net. Thank you in advance for your help.
Actually Pablo, none of the CSS from the tut is visible on your page. Where did you add it?
Same problem for me… did you solve it
All sorted now Izzy? 🙂
Wow! I’ve been looking for a way to do this for ages!!!
Thank you, SJ!!
You are most welcome 🙂
This sounds brilliant!! So the page can remain as a draft?
Correct 🙂 As we’re no longer using the post in it’s natural habitat, whether it’s published or not doesn’t matter.