
Rebranding and customizing the WordPress login screen is an important step for any site that allows visitors to create an account, like a membership site or an eCommerce website. Divi makes it easy to customize almost every element of your website but can be a little tricky to change the logo, colors, background, and other styles on the login screen.
In this post, you’ll learn everything you need to build and set a custom login screen with the Divi theme builder in under 3 minutes.
You’ll also learn how to mask the login URL. Move your login screen off of /wp-admin and /login.php for better branding and as an additional layered security measure.
Two Types of Login Screens
In this article, you’ll learn two types of login screens, including:
- Creating a new login page – This is a page that you can link to from your content. Users and contributors can log in as normal. If they use your standard login URL, they won’t see this page. Instead, they’ll see the default WordPress login screen. You can create this page with the Divi Builder, so it can match your branding and include any features you want it to.
- Customizing the default login screen – This is the default WordPress login screen and our suggested mention. By default it’s not customizable, it’s plain, and doesn’t match your website. Leaving this page unstyled can be confusing, especially when passing a site over to a client. We are going to look at the best plugins available for editing the WordPress login screen with both the Divi theme builder and the Customizer.
Let’s dive-in!
1. Create a Login Page with Divi
First, we’ll look at the included Divi Login module. The built-in option lets you create a beautiful login page without any extensions. This module includes all of the Divi settings and options you’d expect from a Divi module. The downside is that it doesn’t replace the standard login screen, but it works great for creating a custom Divi login page that you can link to from within the content.
For this example, we will be changing up the login screen and giving it a transparent styled background and simple clean boarders.
Divi Login Module
Create a Divi page using the blank template. The page template is selected on the backend using either Gutenberg or the classic editor. Use the Section settings to customize the background color, add an image, or even place in a video.
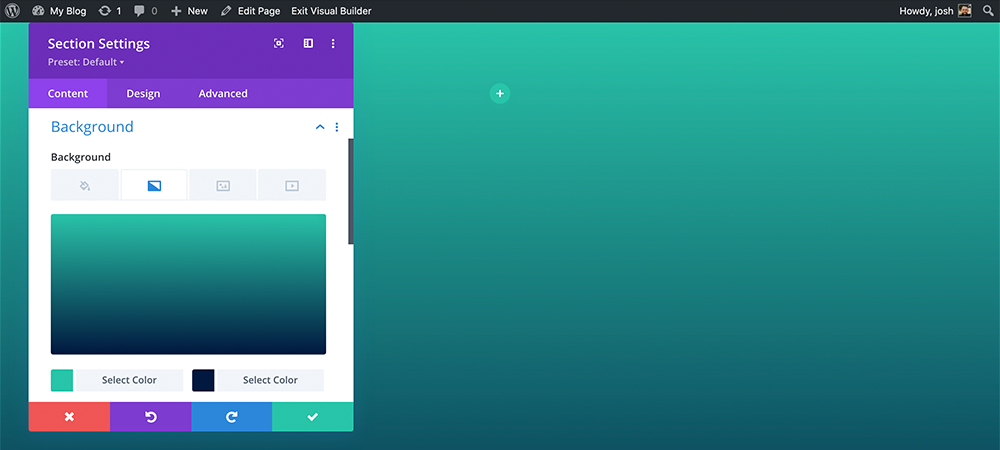
Set your background gradient for the page
For the next step, add a three column row. We will only be using the center row to add our logo and login module.
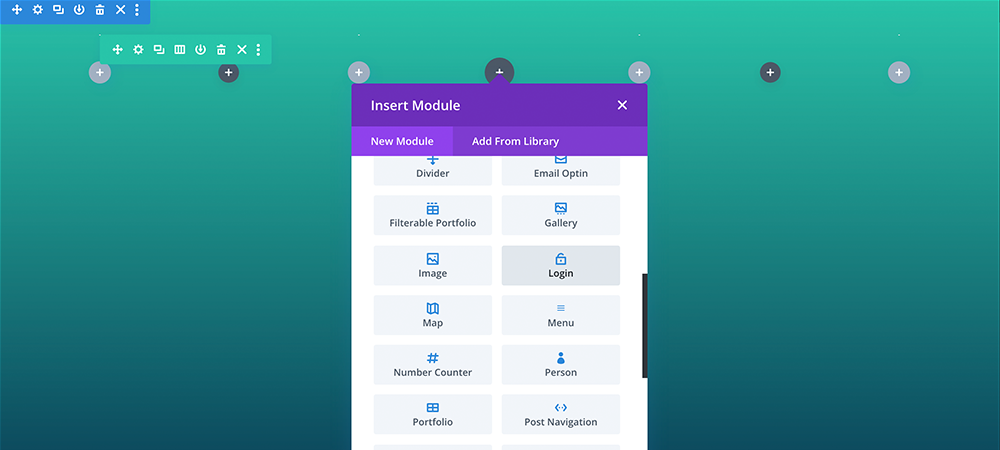
Add the image module and login module to the center column
For the logo, use the image module. Under the design tab, set the Alignment to center and scale the logo to your desired size. If you are following the example it is set to 65%.
Adjust logo alignment and size under the design tab
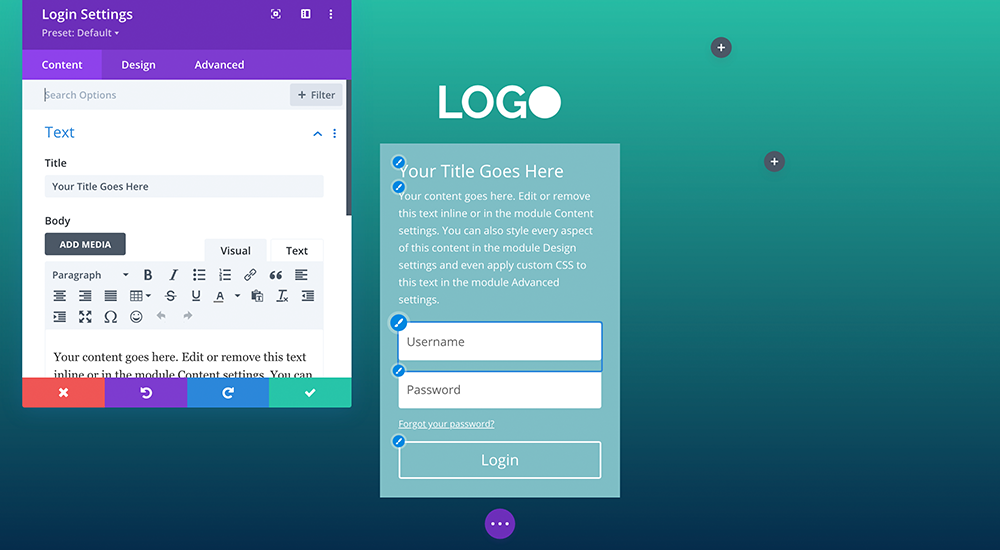
Next, add the Divi Login module. The module includes a title, content, fields, and a button. You can customize the background color, text, fields, button, etc. Add your title and content.
If you are wanting to replicate the WordPress login styling, start by removing the Title and Text.
Add the default login module
Under the content tab, remove the background and set a redirect. Leaving it disabled will redirect them to the WordPress dashboard. If this will be a custom login screen for those logging into the dashboard, leave Redirect disabled. If you want them to remain on this screen, enable Redirect and you can set a custom URL if you have an accounts page or some other area you want your logged-in users to land.
Removing the background color drastically changes the style
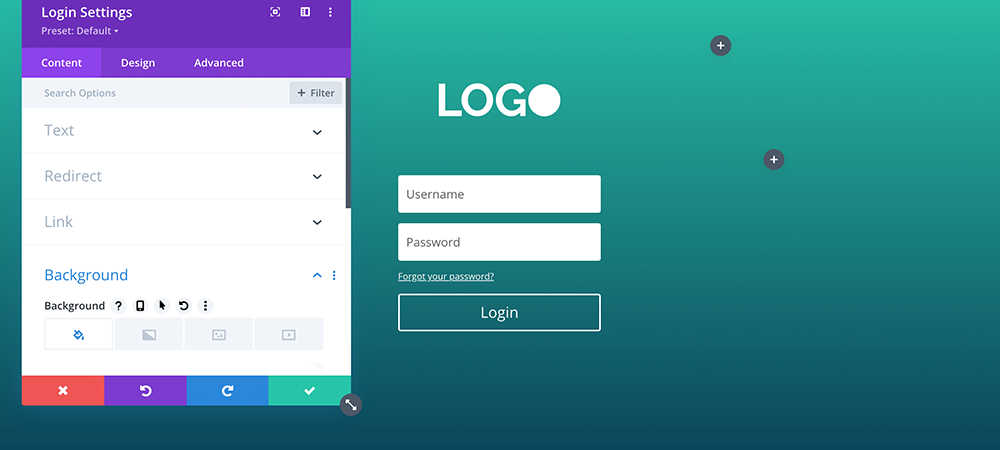
Under the design tab, you can change the field background color, text, focus background and focus text colors. For this ghost style, remove the background color, set the text to white, and give your fields a 1px border.
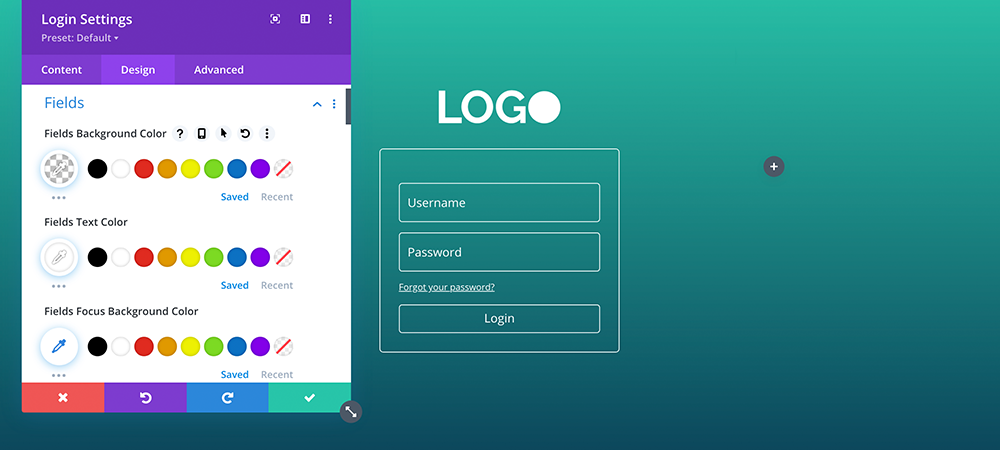
Make background color transparent and set the text color to white
Set the Border option to 1px, with 5px rounded corners. Under the Button configuration options set “Use Custom Styles for Button” to yes. Change the button text size to 16px, border to 1px, and the corner radius to 5px.
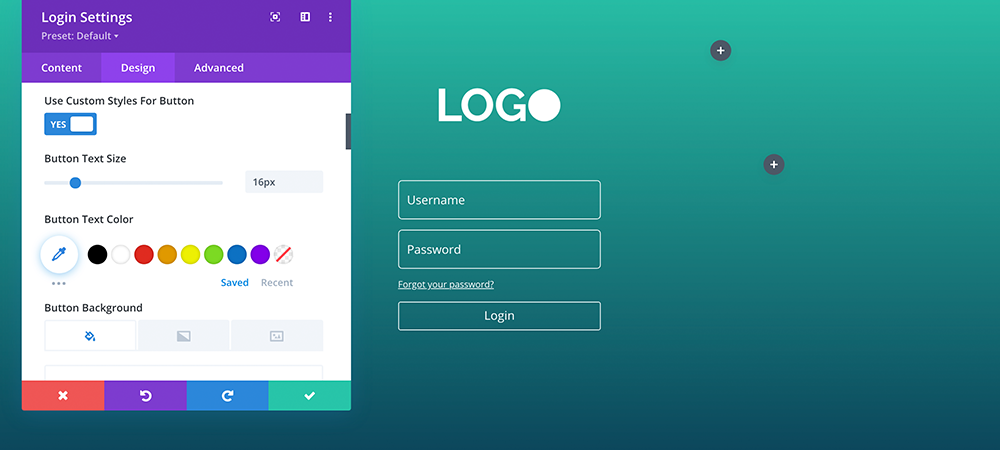
Customize the login button
Divi gives you a ton of control. If you want to adjust the position, size, backgrounds, borders, colors, whatever style you come up with can be easily added to your website.
Divi Login Module Examples
Once you save your design, you will need to log out test the finished page, or open an incognito window.

Here is the completed look
This is the form that anyone not logged in will see. Those logged in will see the form without the fields and button. This Divi login page works great for membership sites, online stores, etc. Simply link to this page using a login link anywhere on the site.
2. Customize the WordPress Login Screen with Ghoster
But what if you want more options and to be able to customize and mask the existing login screen and URL? Divi Ghoster is a white-labeling plugin for Divi that makes it easy to manually rebrand your Divi theme. Whether you’re giving clients access to the WordPress dashboard or allowing users to log in to your membership site, with Divi Ghoster you can white label the WordPress interface to further customize the experience. Divi Ghoster lets you rebrand WordPress and Divi with your company logo, colors, thumbnails, menu items, create a custom dashboard, and more.
Ghoster includes a login page customizer so you can create your own branded login page. Unlike the Divi login module, which doesn’t replace the WordPress login screen, Divi Ghoster customizes the actual WordPress login screen right from the WordPress customizer.
Divi Ghoster Login Customizer
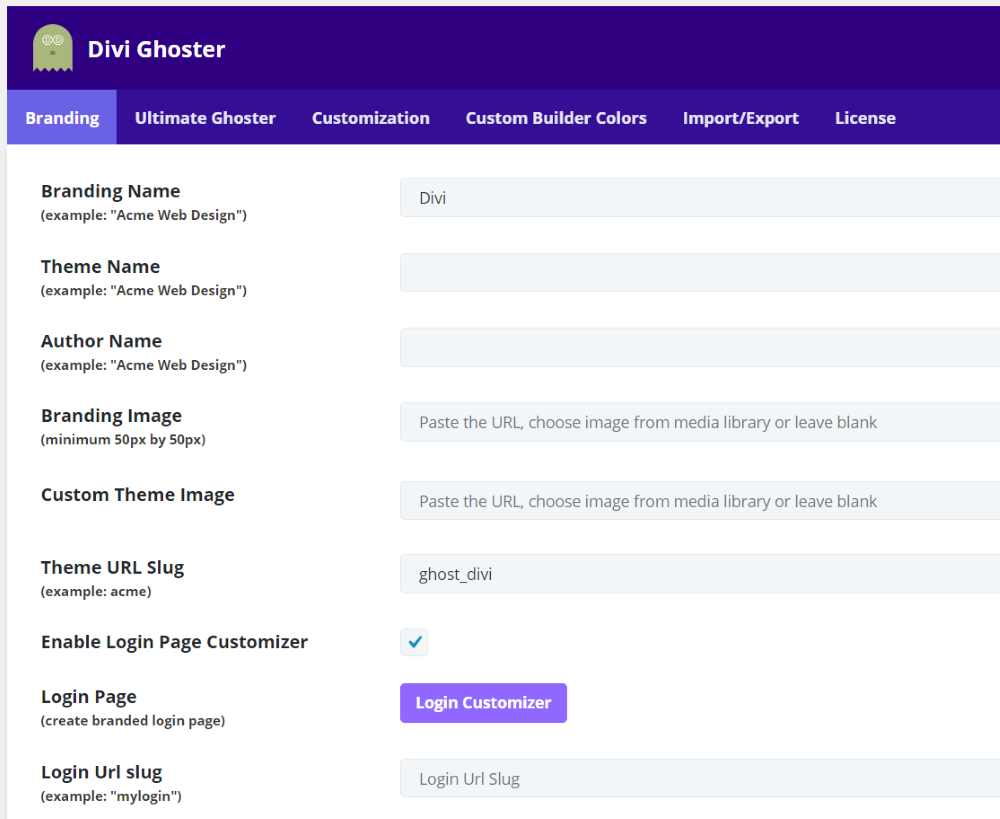
Enable the Login Customizer from the Branding tab in the Ghoster settings
In the Ghoster settings, select the Branding tab, scroll to the bottom, and enable the login page customizer. You’ll also see a button to open the login customizer and a field to enter a new login URL slug, allowing you to create a custom URL for your login screen.
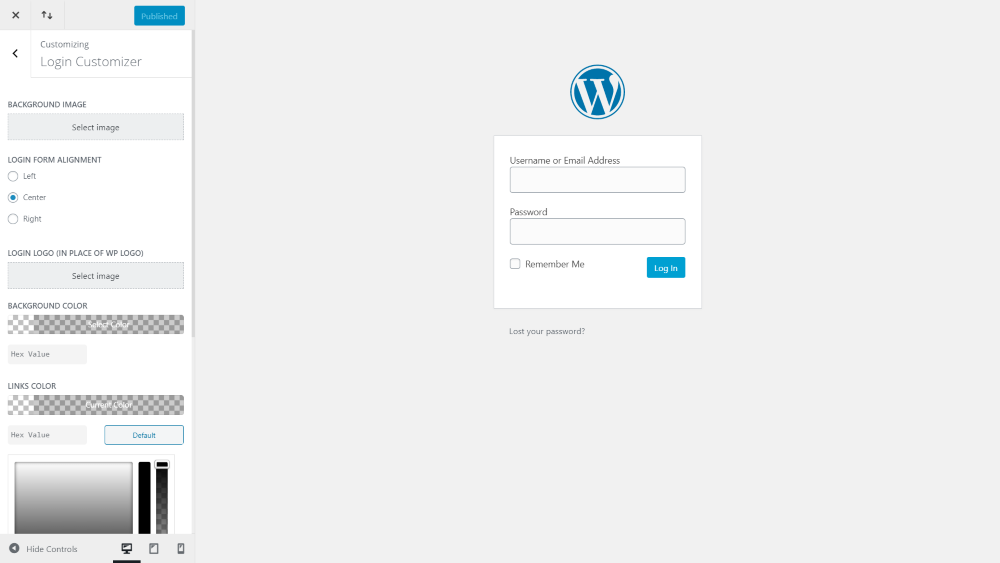
Visit the Customizer to start customizing the WordPress login screen
Clicking the button to open the login customizer redirects you to the login screen with the Theme Customizer open to the new login settings. Add a background image, change the form alignment (right, left, or center), replace the logo, add a background color, change the color of the links, add a background color to the form, add a background image tint, and change the submit color button.
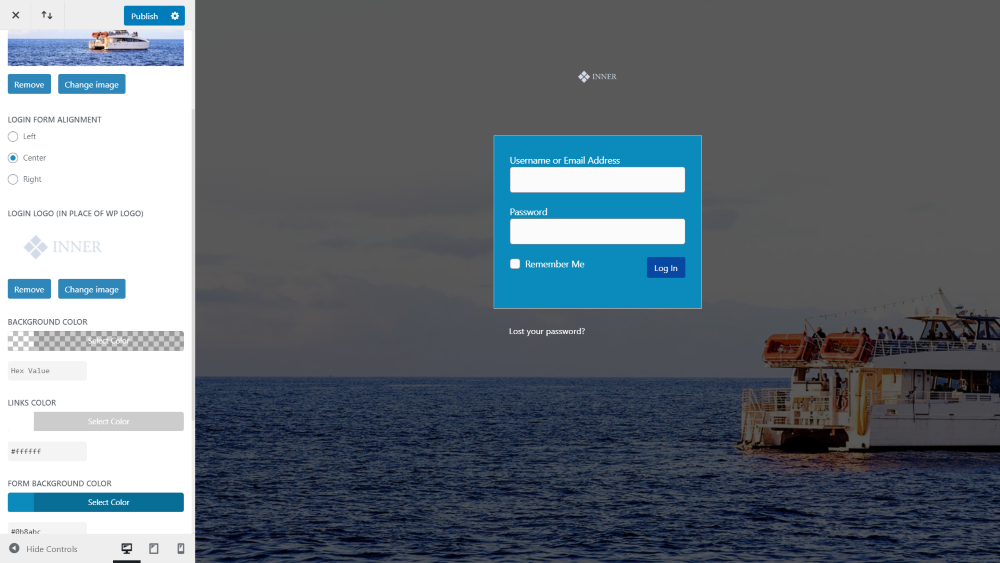
See all your changes as they are being made including background images, logo, and colors
All of the adjustments are simple and intuitive. I’ve made adjustments to most of the settings in this example. The only setting I left at default is the form alignment.
Divi Ghoster Login Customizer Example
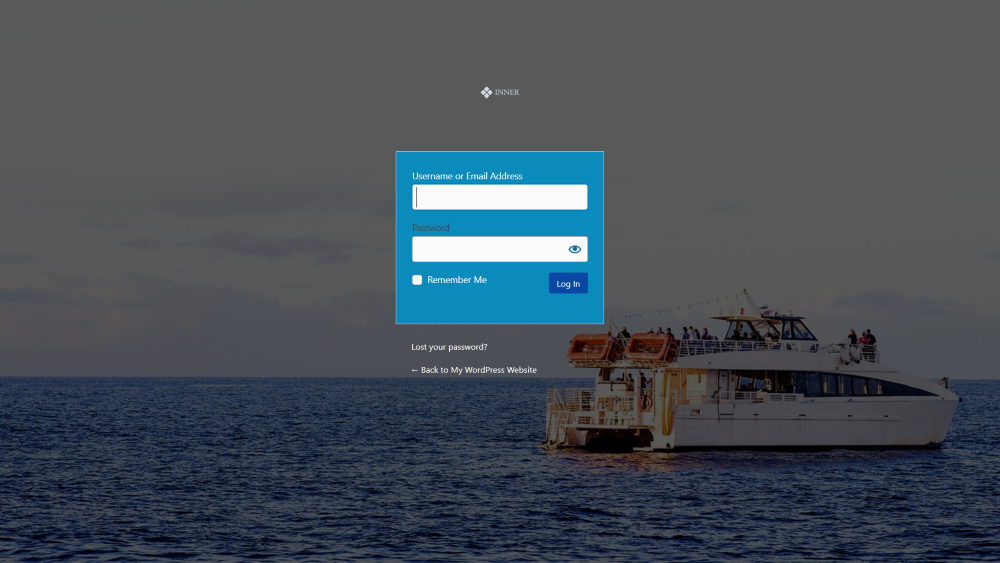
Totally rebrand your login screen in under one minute
This is now the login form that will display to anyone not logged in. Now, anyone that signs in to my website will see this design. Customizing this screen was simple and took less than three minutes.
Now all that is left to do is to update the URL. Go back into Ghoster and under the branding tab type your custom slug into Theme URL Slug field and click save. Don’t forget to check out our full Divi Ghoster documentation if you run into any issues or have questions about server compatibility.
Ending Thoughts
That’s it! You should now be able to fully customize the Divi login screen in under 3 minutes with either the built-in tools or Divi Switch. Using either of these methods really is fast and easy. Creating a Divi custom login page is a great way to add branding and eliminate confusion for clients, visitors, or members.
Divi doesn’t have a feature built-in to customize the default WordPress login screen, but using Divi Ghoster is a great solution for white labeling and masking the WordPress login screen.
Enjoy!
Have you customized your Divi login screen? What method did you use? We want to hear from you! Share your experience in the comments below and tell us what tricks you learned along the way.
This is really good information. Then what happens, though, for Logout? I need that visible too for subscribers who have limited access to content. Thanks for any help you can offer.
After log out, you are redirected to the login page, and “You are now logged out.” notice is appearing above the login form.
Does the Divi Login module support Google Recaptacha?
Can i replace the logo with my own logo?
Yes 🙂
Really Good Stuff! look at my custom login form https://ideep.website/wp-admin
Thanks, @Stephen James for hard work.
Looks great, nice work!
how to change the logo ? at the divi option or use other plugin ? because my logo for divi option have an low resolution and i want the login page have full resolution.
My background login is not transparent but have a white box instead for the input. How can I change this white box to match the background? Thank in Advance for your help
Hi. This is pretty cool. Works fine on my Divi sites but the logo does not display if I use this on a site built with Extra. Can you please help. Thanks.
Ah man, I’ve tried it twice, can’t get it to work???
I’m usually pretty good at this stuff, lol…
Never Mind – Solved – lol
Hi This is great – thanks for sharing!
Do you mind if I ask – What controls the size of the logo? Mine is being displayed quite small and I would like to resize it. The actual logo size I am using 448 × 160 but the size of the logo I see on the login page is displayed at about a half or less of the actual size. Can I ask if this can be set and how?
Thanks for considering!
Hi Cliff, if you look in the login-style.cc you’ll see this:
.login #login h1 a {
width: 200px;
height: 100px;
background-size: contain;
background-position: center;
margin-top: -20px;
}
Just change the height and width to match your logo size 🙂
Awesome! Super simple to install, edit and tweak. My login pages now look amaaaaaaazing. Clients are very happy with this new styling. Thanks SJ for yet another excellent FREE Divi plugin and tutorial.
Most welcome Amy 🙂 Thanks for using our stuff
My login page seems stuck on the same two colors – green and white gradient. I’ve uninstalled and reinstalled and repasted the code above, but I cannot get it to change. Any suggestions?
Are you changing the login-style CSS? You won’t be able to apply changes through your normal style sheet.
Would this works on EXTRA as well ?
Hi there,
I just downloaded the Plugin and had a look at the files. Wouldn’t it be easier to copy and paste them into the respective files of my child theme?
Best,
Tanya
There is not a stylesheet which will affect the Login page. The plugin intercepts the call for the login page and links to the stylesheet.
A plug in required for this, unless you want to manually edit your login page.
Thanks SJ, this is great. is there anyway of changing the background of the text boxes from the pale yellow to transparent to. it stays pale yellow for me when i log out and the username and password are saved.
Thanks again for the tutorial
Thank you – the login page looks incredible.
Bravo for making this free.
Fantastic Work very simple easy to do really fun. Thanks